Cyanotypes; Anna Atkins
|
|
|
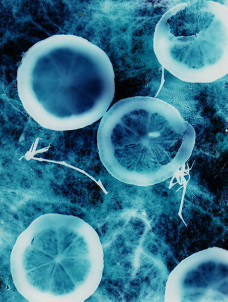
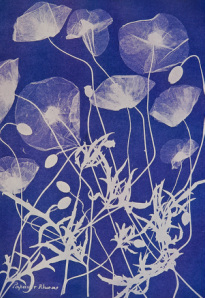
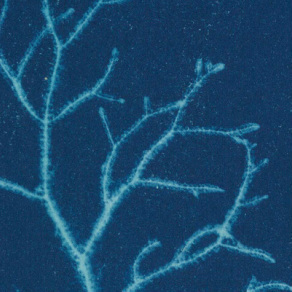
These three images of Anna Atkins photograms stuck me instantly, I loved how all of them have different patterns; straight lines, circles and curly lines. They are all different, but in their own way, are the same. Anna Atkins was an English botanist and also a photographer. To today, she is considered to be the first person to publish that has been illustrated with photographic images. Anna and one of her friends, invented a photographic process in 1842 called cyantype. This process involves the chemicals ammonium iron citrate and potassium ferricyanide are combined. Due to this all of the images come out with this blue/cyan colour. Within a year, Atkins applied the process to algae which is the picture on the left from her book British Algae, this was done by placing the unmounted dried-algae directly on the cyanotype paper, which then reveals different patterns within the object. Anna Atkins published a total of three British Algae between the period 1843 and 1853 and only 17 copies of the book are known to exist, these are owned by different institutions such as the British library. In the 1850's Anna worked together with Anne Dixon to continue creating these cyantype images. Together they created three different albums of this photography which again, are held by different institutions. Anna is claimed to have been the first ever female photographer, however because none of the images from her period have survived, this cannot be confirmed.
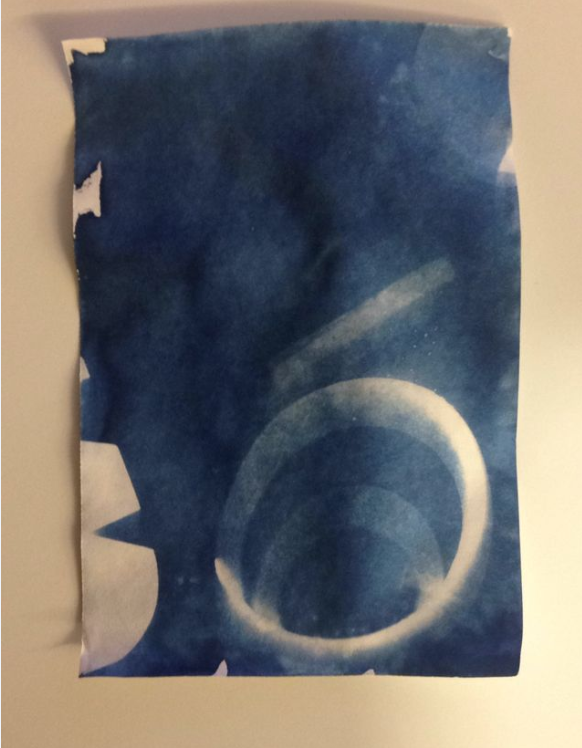
My Cyanotype
|
|
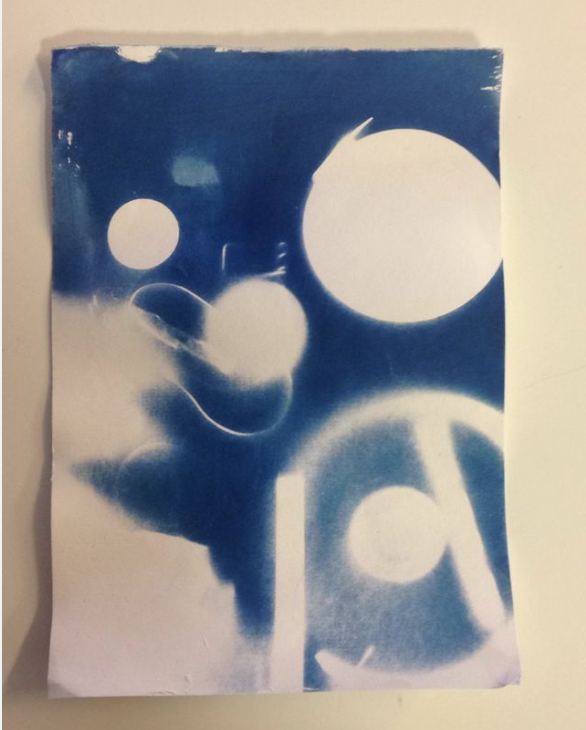
I think that the image on the left is successful because you can clearly see the colour in it and it keeps the flow to the picture. However the image on the right has very weak colours and there's not a lot to it, so this is definitely one of my less successful images. The reason why it's not as good as the other is because leaving it outside meant that I had to deal with my objects flying away in the wind, meaning the paper was exposed to too much light. The elements that inspired my work is pattern and shape. With the cyanotype images I wanted to find objects that had different shapes to them, curves, sharp edges, and straight lines. I felt like I done a good job at showing these elements however because of the objects moving in the wind the harder edges and straight lines are difficult to see because they slightly moved. From looking at my research I learnt that lines and shape were key aspects to making a successful image. Laszlo and Atkins both use these elements so I wanted to add these in my own response. I felt like this really helped me because it meant that I had something to work from, I knew what I wanted to achieve being influenced in these elements shown in others work.
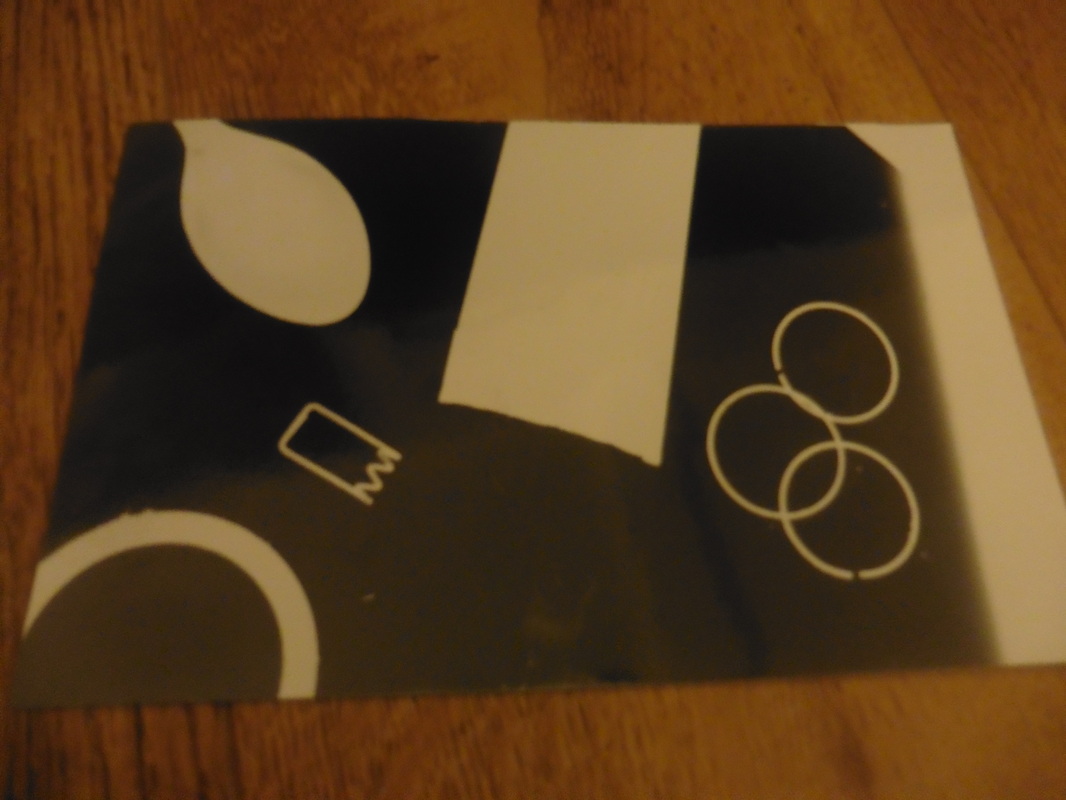
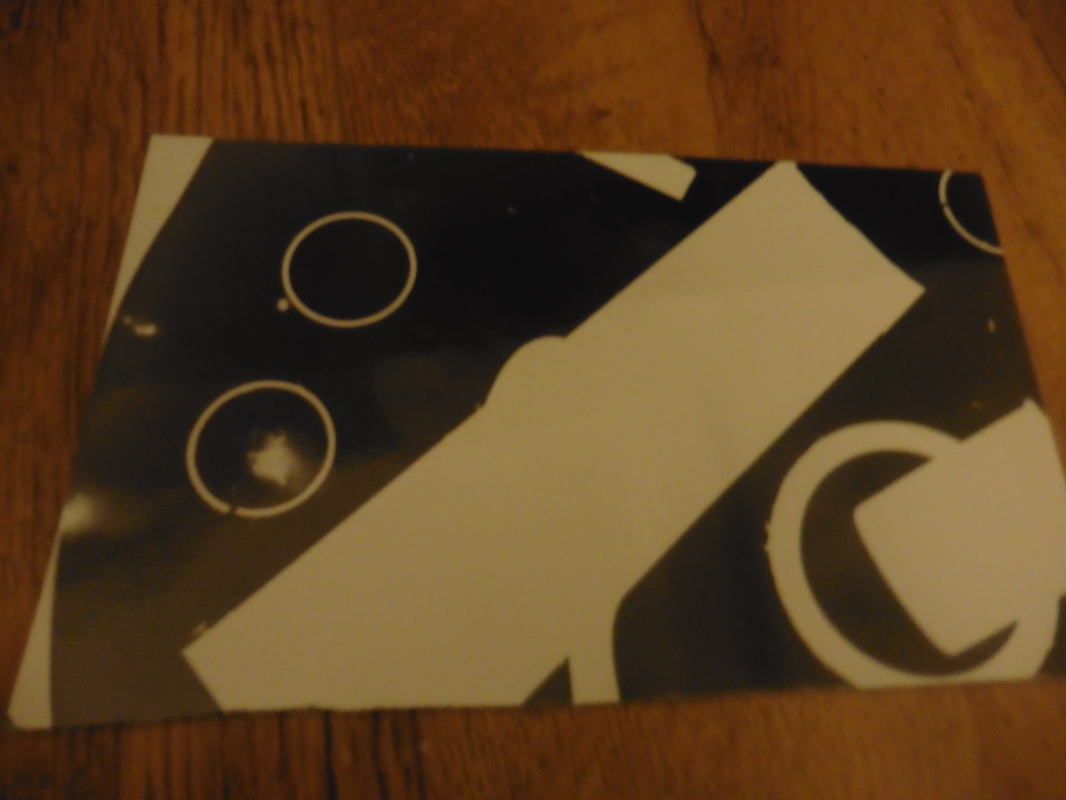
Photograms; László Moholy-Nagy
|
|
|
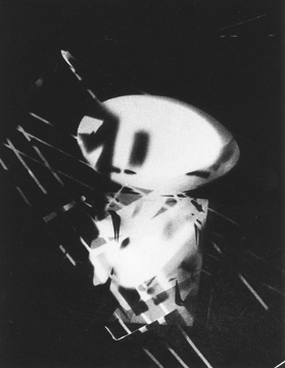
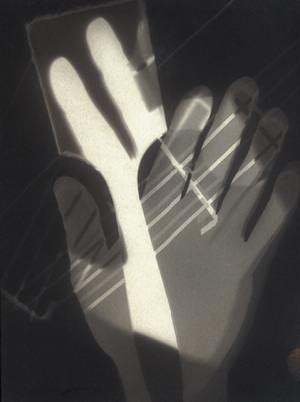
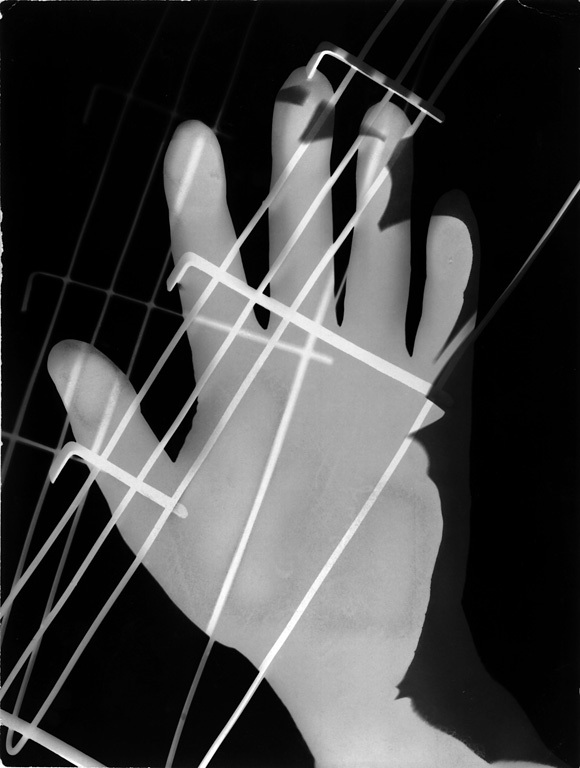
I really the first photogram by László Moholy-Nagy because with all the shapes and how its been put together it looks like a little robot, however you can see a variety of other images that have been used to form this image. I think that this image was well designed because its the shadows that make up the face of the robot type creature, and the placement of them make the light overlap. The egg shape is the most clear part to the picture in the way that the light is the only consecutive thing there, however all of the other light in the image is on different scales. I have selected these three photograms because they are all very similar, they have used the same item to create the lines as well as a few more, however they look remarkably different which is why I like these images.
László first created a photogram in Berlin 1922 which he then continuously produced till 1946. His collection of 430 image are on exhibition which is one of the largest presented. In the exhibition you can see the areas in which his work was made Berlin from 1922-1928, the Bauhaus period from 1923-1928, then exile in London 1935-1937 and finally the United States in 1937-1946. In 1923 László was experimenting with the photographic process of exposing light sensitive paper with objects overlain on top of it, his work inspired a number of his students. This helped him continue the idea of photograms as they followed too.
László first created a photogram in Berlin 1922 which he then continuously produced till 1946. His collection of 430 image are on exhibition which is one of the largest presented. In the exhibition you can see the areas in which his work was made Berlin from 1922-1928, the Bauhaus period from 1923-1928, then exile in London 1935-1937 and finally the United States in 1937-1946. In 1923 László was experimenting with the photographic process of exposing light sensitive paper with objects overlain on top of it, his work inspired a number of his students. This helped him continue the idea of photograms as they followed too.
My Photogram
|
|
In order to make a photogram, you have to get some photographic paper out in the dark room, and make sure there's no light about. If light touches the paper it will be exposed and the paper will begin to try to develop the image,
this is why it's important to make sure you're in the dark room with no lightsource on. First of all I had to find out how long I should leave the light
on while the paper was underneath. I then covered up most of the paper, but leaving a little bit free and exposed that section for 4 seconds.
this is why it's important to make sure you're in the dark room with no lightsource on. First of all I had to find out how long I should leave the light
on while the paper was underneath. I then covered up most of the paper, but leaving a little bit free and exposed that section for 4 seconds.
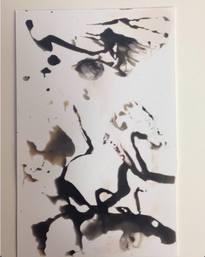
Chemigams; Pierre Cordier
|
Cordier was writing a dedication with nail polish on photographic paper to a young German woman. He then realised that there was a reaction between the photographic paper and the nail polish. He then called this a chemigram. This technique "combines the physics of painting (varnish, oil, wax) and the chemistry of photography (photosensitive emulsion, developer, and fixer), without the use of a camera or enlarger, and in full light". [1] This became his main source of experiments and he continued to make these chemigrams. Several important figures in the arts were interested in these new visual possibilities. Cordier produced many chemigrams as well as photographic self-portraits. These images were available for the public to see in 1958 during the Subjektive Fotografie 3 exhibition in Cologne.
When looking at this picture the elements that might influence me in my own work is the shapes and the patterns that Pierre used. I've learnt that in order to create a successful image, you need to keep it consistent and to keep it simple. In the example image of Pierre Cordiers image, he uses a few colours and the pattern is repeated a lot, however this makes such a simple picture successful. When making my own response I done the same, I didn't want to try to make something neat and perfect and put a whole ton of effort into it, so I made sure I used simple lines and simple patterns to create an elegant and abstract. Compared to other images, Pierre goes into a lot more detail to make an image that actually looks like he has put effort into it designing it. Instead of a lot of other artists, using straight lines making it look like a bowel of coloured spaghetti. In order to make a chemigram you have to use the developer chemical onto photographic paper, this is what will bring colour to the image and show the design you made. Once this is done you wash it off in water and leave it to dry. |
|
My Chemigram
|
When looking at my chemigram you can clearly see that there is a lot of curly lines. After looking at Pierre Cordiers images I was inspired to create something abstract and random. In order to achieve this I made sure none of my lines are perfectly long and straight. I used my finger to paint the dark lines onto the photographic paper. I dipped my finger into the stop solution and painted it like that. This meant that all of my lines would be a different shape because the liquid would slowly come off of my finger. I could also have a lot more control over where my lines went, as it was done by hand. I think that this image was successful in displaying some of the formal elements while creating an image that has some interest. You want to look at the shapes and the colours and decide what they mean.
|
|
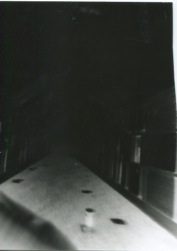
My first attemptWhen taking this picture I had a few problems. As you can see not all of the picture has been developed. This can be because there was too much shadow in the picture so not enough light was going through, so the paper negative wasn't fully exposed to the light. This means that the picture wasn't able to process completely as not enough light was there. In order to stop this happening there are a few things I can do. I can go to a different location where there isn't so much of a shadow. This means more light will go to the paper negative and will be better when developing as theres more to the image.
My second attemptFor this image I used a Leonardo pin hole camera, this wasn't built by me and was provided by the school. As you can see there is a lot more colour than the first image. This was exposed for less time around 45 seconds and it managed to pick up a lot more light. This was a different location to the first attempt and worked well due to it not being in an enclosed area. Also there was an open space for the image to be taken so the lighting was equal. This image was the best one that I took and so I used it as my final image. I had many issues when trying to take a paper negative as I constantly over exposed it, making the picture come out black.
|

|
Making my pinhole camera
In order to make my pinhole camera you need the following items;
1. A tin like a bisto pot for the base of the camera
2. Some black duck tape to hide up the holes that are letting in the light
3. A drink can to get or a piece of aluminium to prevent any of the light reflecting
4. A pin to determine the size of the lens
5. Some sand paper to smoothen down the rough edges
6. Black paint to paint the inside of the tin removing all other sources of light
7. Black paper to make a flap, this is to create the shutter and view finder
To make a pin hole camera take your container and paint it with a thick evenly spread cover of black paint. This covers all the light getting in so a picture can be taken with no bright patches. Secondly, poke a whole in the middle of your container. This will be where the picture will be taken from. When this process is done some of the paint may get chipped off, if so repeat the previous step. Lastly, get some black paper and fold it so you can make a small flap to cover the hole you made in the tin, sellotape one side of your flap which will create a view finder. The sand paper will be used if you are using a aluminium tin. When making your whole some of the tin can be pushed back creating unstable edges. These need to be sanded back to create a smooth surface, if the edges are rough the lighting in the camera will be distorted.
Developing my pinhole camera
In order to make a paper negative image you will need;
- 100ml Developer solution
- 50ml Stop bath
- 250ml fix solution
- 3 pairs of tongs
- 1,600ml of water at 20 degrees (this is the perfect temperature for the chemicals to work together in the stock solution)
